


I have been wanting to create a modular origami dragon for a while, but have never found any instructions or good references until I came across Samuel Ferreira's dragon.
That photo is the only reference, so here is my version. I have tried to keep the design and construction as close to the original as possible, but inevitably there will be differences.
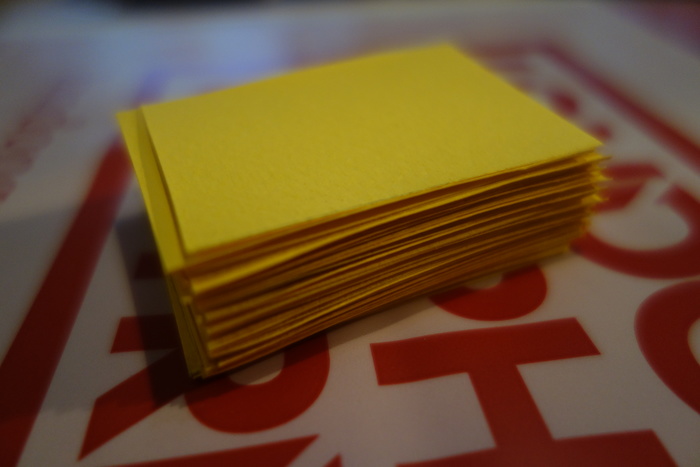
The usual A4 sized paper can be used. Normal printer paper at 80gsm is perfect. For this particular origami, I used 150gsm red paper and 160gsm yellow paper. However, this is not recommended as it is too heavy and the pieces can bulk out easily. This makes it harder to assemble.
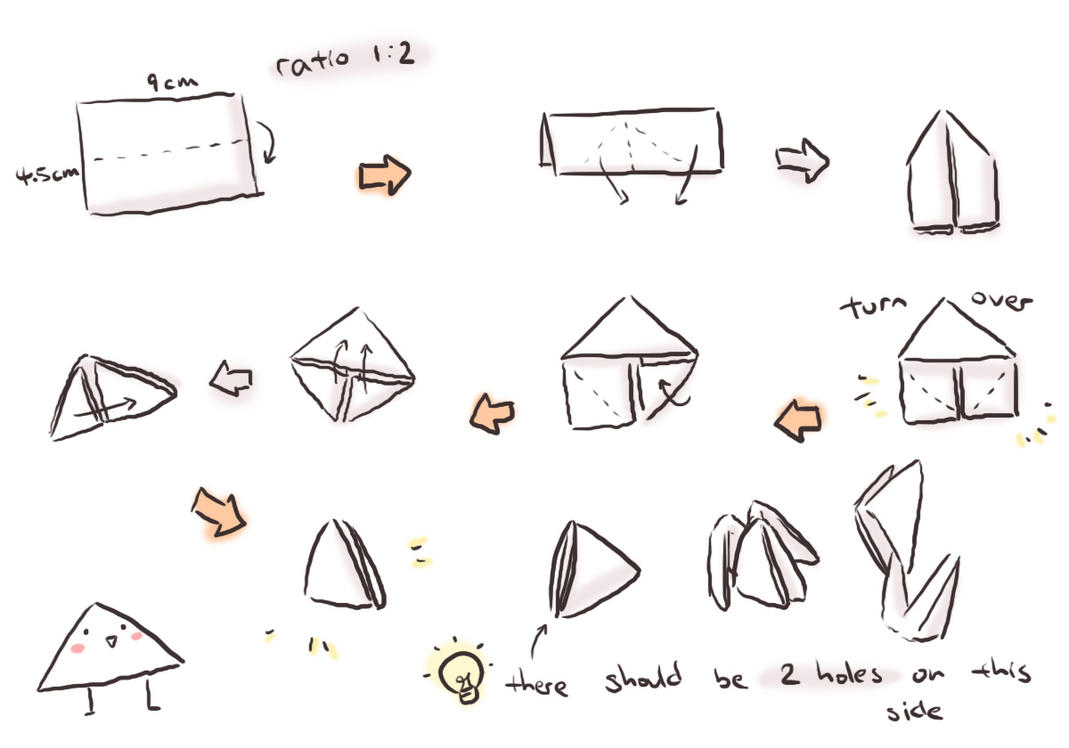
Four different sizes are used to create the pieces and are represented by ratios.
- 1/16 - divide paper into 16 pieces
- 1/32 - divide paper into 32 pieces
- 1/64 - divide paper into 64 pieces
- 1/128 - divide paper into 128 pieces
Keep bisecting the paper by its longest edge until you get the desired division.
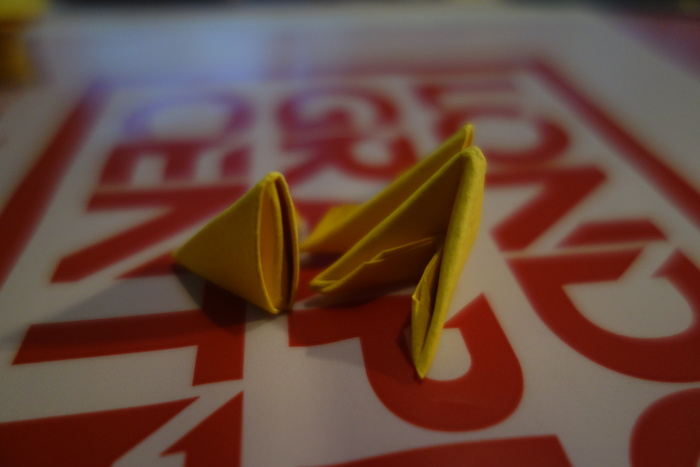
Each triangular piece is constructed in the same way, irrelevant of the size. Instructions can be found here or here.
Construction of the dragon is shown below with the number of pieces required for each component detailed alongside. A summary of all the pieces used is given at the end of this post.
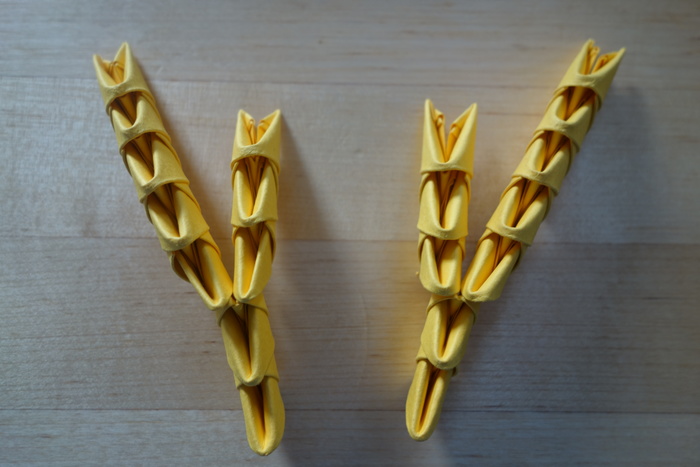
Horns
To make the horns, 36 1/32 yellow pieces are required, 18 for each horn.
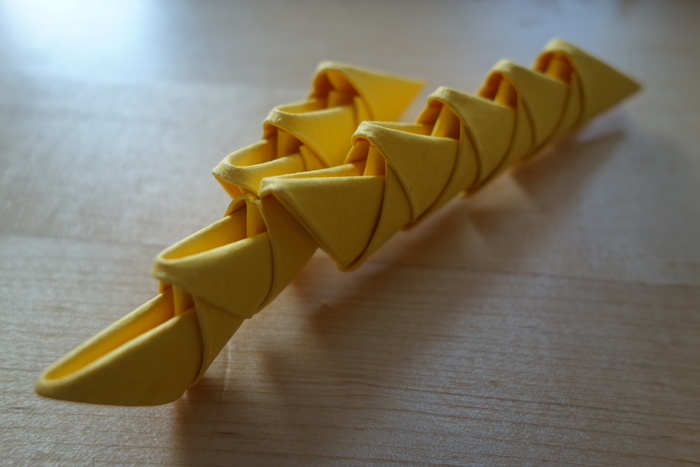
Pieces are rotated at each connection to produce a stepped effect.
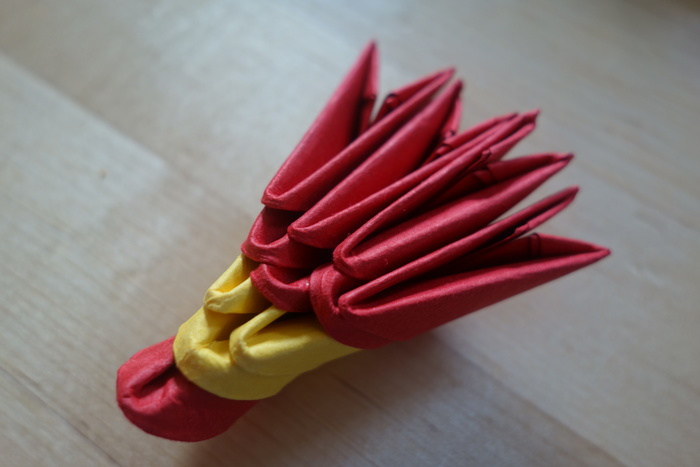
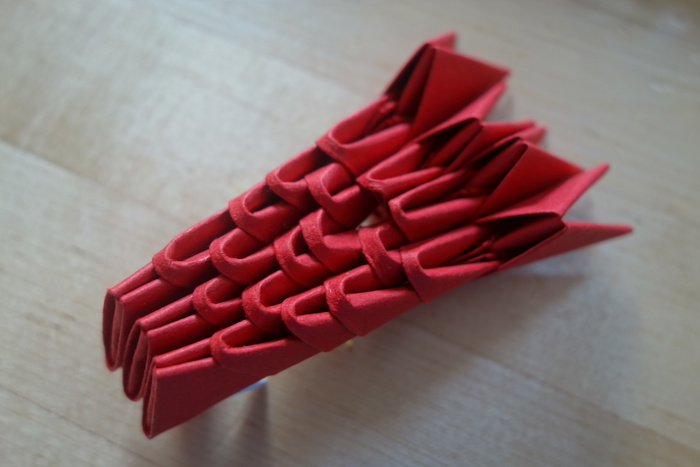
Tail
The tail requires 3 1/16 yellow and 8 1/16 red pieces.
It is best to start from the base, and try not to compact the pieces together until the body has been made. This makes it easier to connect togther.
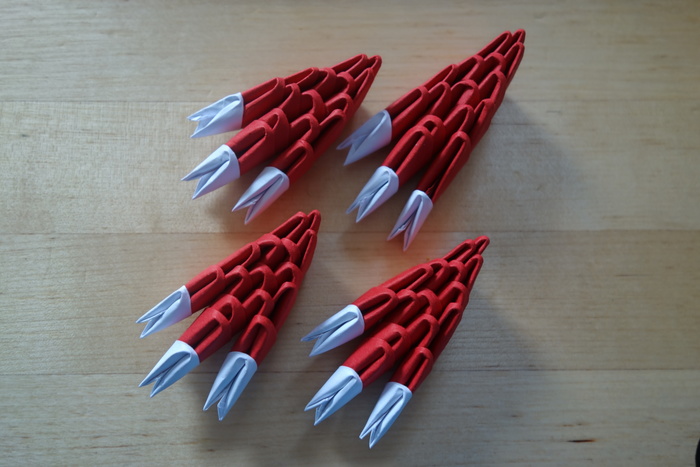
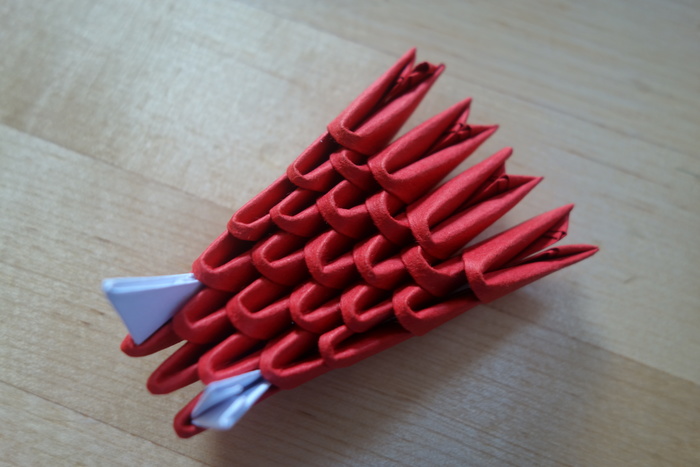
Feet
Each of the dragon's feet uses 15 1/32 red and 3 1/64 white pieces.
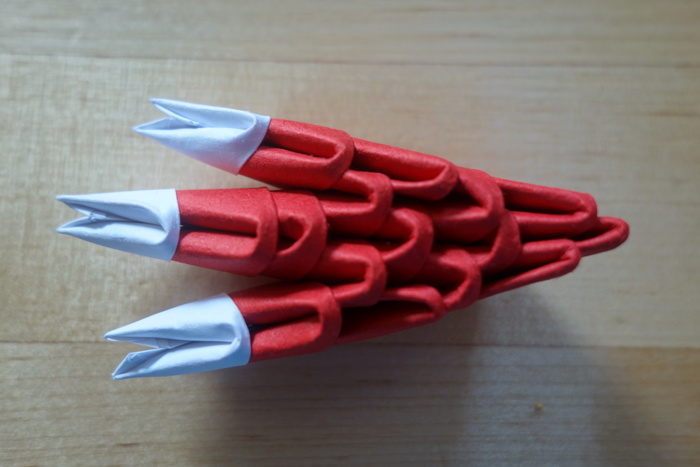
Each foot is identical. An extra four red 1/128 pieces are later used to connect each foot to the body. This can be made later.
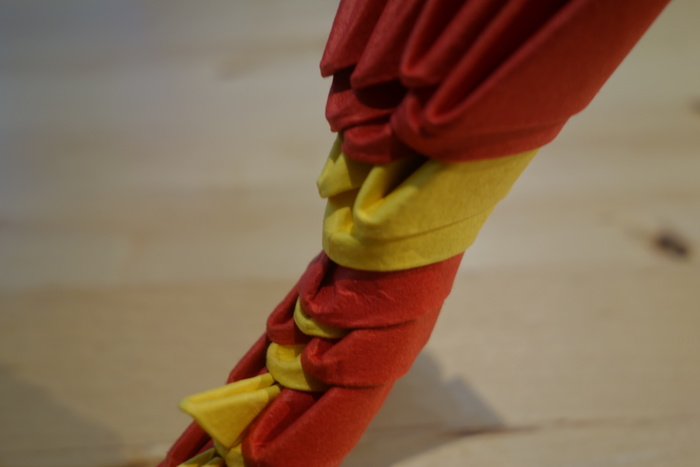
Body
The body of the dragon takes the longest to make, since it consists of 90 1/32 red, 45 1/32 yellow and 44 1/128 yellow pieces. However, it is the simplest to construct.
Each pair of red pieces are joined by a single yellow piece. This is repeated along the length of the body.
The 1/128 yellow pieces are inserted afterwards to make the dragon spikes.

Two red 1/128 pieces are later used to connect the body to the head.
The body can be kept straight for now, or you could try to form its final shape.
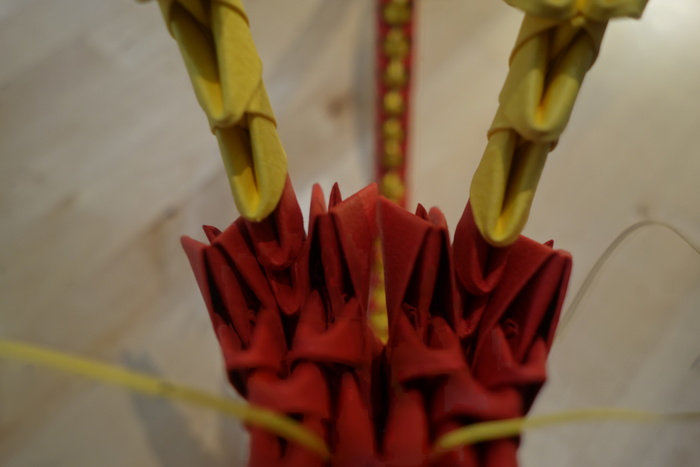
Head
Overall, the dragon's head uses 7 1/16 red, 60 1/32 red and 4 1/64 white pieces.
This is the lower jaw:
The 1/16 red pieces are all used in the upper section of the head (three at the front and four at the back). Note how their orientation is flipped when compared to the 1/32 pieces.
The smaller white pieces become the dragon's teeth.
The rest of the red 1/32 pieces form the back of the head and connects the lower jaw and upper sections. This component is experimental, so the top two pieces may not be needed depending on overall proportions of the dragon.

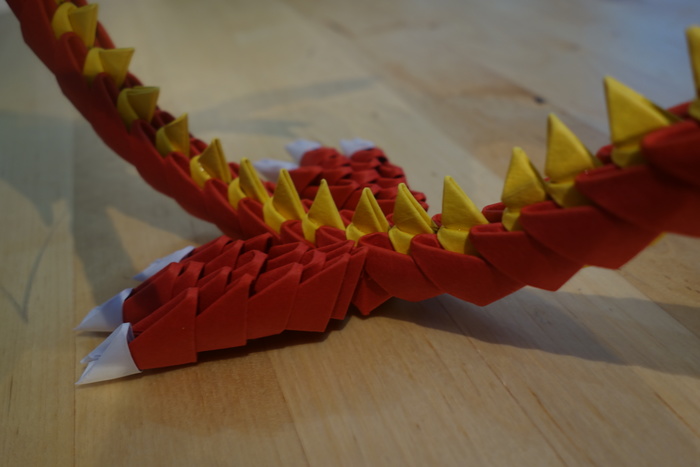
Final Assembly
Start by attaching the tail to the end of the body.
Begin to form the final shape of the body. This can be tricky as pieces may want to disconnect. Be persistent and shape a little section at a time.
When it comes to the feet, use the 1/128 red pieces as connectors. Their orientation depends on where you attach the feet to the body.
The head is the hardest to assemble as pieces tend to completely fall apart. Place the three bottom pieces of the back of the head into the lower jaw. There are corresponding slots in between the four pieces at the back of the lower jaw.
Once they sit comfortably, carefully slide on the upper section of the head.
Use another two 1/128 red pieces to connect the body to the head. The small connectors sit within the two central pieces of the lower jaw.
Finally place the horns on top of the head.
Two long strips of yellow paper can be cut and rolled up to form the dragon's whiskers. Alternatively, use two yellow twist ties as in the original version.
The dragon's eyes will need to be attached as well.
If pieces keep falling off, use a dab of glue to hold them in place.
Finished Origami
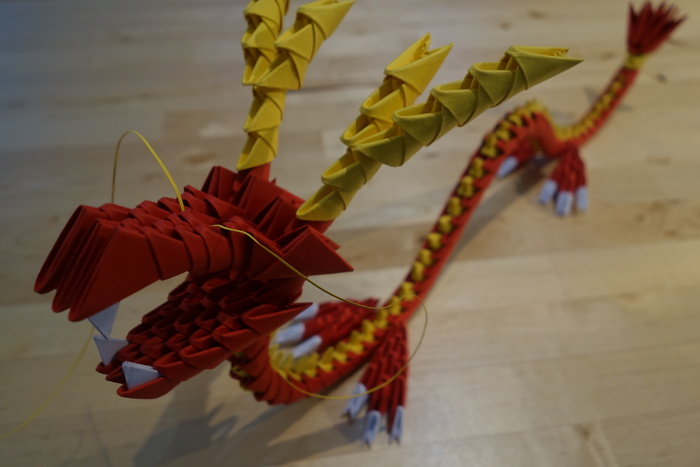
This version has some slight differences to Samuel Ferreira's original dragon. In particular, the back of the dragon's head appears to be more complicated than it needs to be.
Overall, the dragon sits well on flat surfaces but does tend to fall over if the head is not balanced sufficiently; it is a bit too heavy due to the weight of paper used.
Here is a summary of all the pieces used in the final origami.
| Size | Red | Yellow | White |
|---|---|---|---|
| 1/16 | 15 | 3 | |
| 1/32 | 210 | 81 | |
| 1/64 | 16 | ||
| 1/128 | 6 | 44 |
Altogether, 375 pieces are used and surprisingly not much time.